Showing posts with label Weber BBQ. Show all posts

Friday, September 1, 2017

Beef Short Ribs Charcoal Barbecued with Homemade BBQ Sauce

Just in time for the Labour Day long weekend we are going to take a look at how to BBQ perfectly tender, seasoned beef short ribs basted and cooked in a homemade BBQ sauce.

This dish is cooked on a charcoal grill and has to be done over indirect heat.


We looked at using the indirect method with charcoal before. It simply means that you bunch your charcoal towards the sides of your barbecue leaving a fairly large space in the middle without any hot charcoal.


This dish also requires buying some aluminium foil BBQ trays. It is preferable if you can get the ones with small slits on the bottom, but not essential.

The "indirect method" with charcoal at the sides
Here we are going to be making 6-8 bone-in beef short ribs uncut.

The first step is to take out your ribs and season them liberally on both sides with sea salt, black pepper, garlic powder and mustard powder.

Let them sit at room temperature for 30 minutes.


Meanwhile, slice up two large Spanish onions and two celery stalks and line the bottom of your foil pans with them


Take your seasoned ribs and, in batches, sear them over the hot charcoal at the sides of the grill for about one minute a side.


Place your seared and seasoned ribs on top of the bed of onions and celery and put the trays over the center of the grill with no charcoal underneath.


The total cooking time for this dish is 2 to 2 1/2 hours. This first part of the grilling takes 30 minutes. You want to maintain a consistent heat but not allow this to get too high, meaning you want to be cooking 10-15 minutes top on your barbecue and then 5 minutes top off to let the coals flare back up.

During this first grilling period you can make your homemade BBQ sauce. To do this mix the following ingredients throughly in a bowl:

BBQ Sauce Ingredients:
1 cup ketchup
1/2 cup chili sauce
1/2 cup prepared mustard
1/4 cup vinegar
1/4 cup Worcestershire Sauce
1/2 cup brown sugar
1 teaspoon chili powder
1 teaspoon cumin
1-2 teaspoons Tabasco Sauce

This is a terrific BBQ sauce for any number of dishes and works very well here.

You should put some aside in a separate bowl for dipping later if you want extra sauce so as to prevent cross-contamination.

After the first half hour of cooking, spoon some sauce over the top of each of the ribs so that they are covered with it. Flip each of the ribs and cover the other side with sauce as well. This is the only time you will flip the ribs.


BBQ the ribs for another 90 minutes to 2 hours until they are tender and the meat can be easily pulled from the bone. Remember to continue to alternate 10-15 minutes top on, 5 minutes top off throughout the entire cooking process.

Be sure to sit out, listen to some radio, chat with friends or loved ones and have some drinks while doing this!


The onions and celery will be very browned and even caramelized in parts, but are really tasty. While you can cut the ribs up into riblets I like to serve them uncut and to pull them apart and eat them by hand.


They are a perfect weekend or holiday dish that go nicely with rice and salads, garlic bread and red wine or beer!

Enjoy.

See also: Standing Prime Rib Roast done two ways: On the BBQ or in the oven with mushroom gravy

See also: Beer Can Chicken with "French Fried" Asparagus on the BBQ!

Saturday, April 18, 2015

A beginner's guide to charcoal grilling a steak...with Schwartz's Montreal Steak Spice & Grilled Salami

Today, as we head into BBQ season, we will be taking a look at the basic technique of charcoal BBQing steak...an actually rather easy treat for special events that many find very intimidating. We will also be looking at the very impressive results one can get by tossing salami, summer sausage, pepperoni or meats of this type on the grill.

There is always a debate between charcoal and propane or gas barbequing . Many, rather mistakenly in my opinion, see charcoal barbequing as somehow "difficult" or very time consuming, which, as we will demonstrate here, is simply not true.

Flavour wise, however, there is no real debate. Charcoal barbequed food tastes better. Period. It gets a smoky taste that is not achievable with standard propane barbequing.


For this post we are going to set up the barbeque and grill some seasoned Rib Eyes and T-Bones.

I am using a Weber standard style BBQ. Webers are great BBQs. Very well made and quite inexpensive. A basic Weber model will run $120-150 (and only the worst propane BBqs are available for so low a price) and will last for years. The one that I own, which is a more "deluxe" model, with a side table and some other "extras" is more than that, but I got mine for $50 at a yard sale. To show how long and how quality an investment a Weber is, I had my first grill for over 8 years (and I gave it away, so it may still be going strong) and this "used" one I have had for 5 years.

A Charcoal Chimney!
The most common complaint people have is that they find charcoal hard to get burning. But with a simple and very cheap ($10-20) accessory (that is actually sometimes included with a new Weber), the Charcoal Chimney, it is really easy and quick to get it started. In addition it requires absolutely no stater fluid,  thereby avoiding that awful taste that can be imparted to the food we all remember and have encountered when charcoal is over-drenched in fluid by an inexperienced BBQer.

You place the chimney in the bottom of the BBQ, removing the grill rack itself of course, pour the charcoal in the top and stuff old newspaper underneath (the sections for this are separated). You lite the newspaper on fire and the flames will get the charcoal burning. This takes at most 5-10 minutes. When the charcoal is good and red hot, you simply use the handles to turn the chimney over and dump out the charcoal. It is that simple.

Within a few minutes of emptying the chimney, you are ready to go.

For this BBQ I used "chunk" charcoal. I prefer this to briquets for doing steak, as chunk charcoal burns very hot, very fast. (As we will relate in future posts, briquets are better for BBQing for a long time, as when doing a whole chicken or roast).

When cooking steak on the BBQ, I like to wait for the charcoal to be red hot. This technique will sear in the flavour and juiciness , and gives the steak a great texture.

I seasoned the steaks with Schwartz's Montreal Steak Spice from the famous deli in Montreal. They have a whole array of seasoning blends that you can buy at the deli or order online. They are all excellent. The steak spice is a terrific blend of salty and spicy (though very mildly so). If this is unavailable Club House Montreal Steak Spice is quite good, or season simply with salt and pepper or whatever else you like.

No matter what you are seasoning the steaks with, you should let them sit at room temperature for about half-an-hour after seasoning and prior to grilling.

I cook my steaks rare, though many people prefer steaks medium rare. A steak one inch thick will require only a very short cooking period once the charcoal is red hot. Half inch grocery store cuts even less. I do about two-three minutes a side, then turn the steaks 90 degrees on the grill and do them another minute a side to create those visually appealing cross-hatch grill marks.  (This is entirely optional).

The way to tell if your steak is how you like it depends on the "give". Never cut open or puncture a steak to gauge its "doneness". This will allow the juices out, which really hurts the steak. The more give there is on the steak when gently pressed with a spatula or tongs, the rarer it is. A lot of springiness means it is rare. A little more resistance and it is medium rare. Once the springiness or give is gone or almost gone, you are heading into medium and well done territory.

If this is your thing, fine. But it really does turn a delicious steak into shoe leather.


It is always worth noting that if you really think it is underdone for your taste after all is said and done, you can always toss it back on the grill. When you have overcooked a steak, there is no way to "undo" it. So err on the side of flavour and rare!


After the steaks are done, take them off and let them sit for a minimum of two minutes on a flat platter/plate, prior to serving. This is essential to maintaining juiciness.

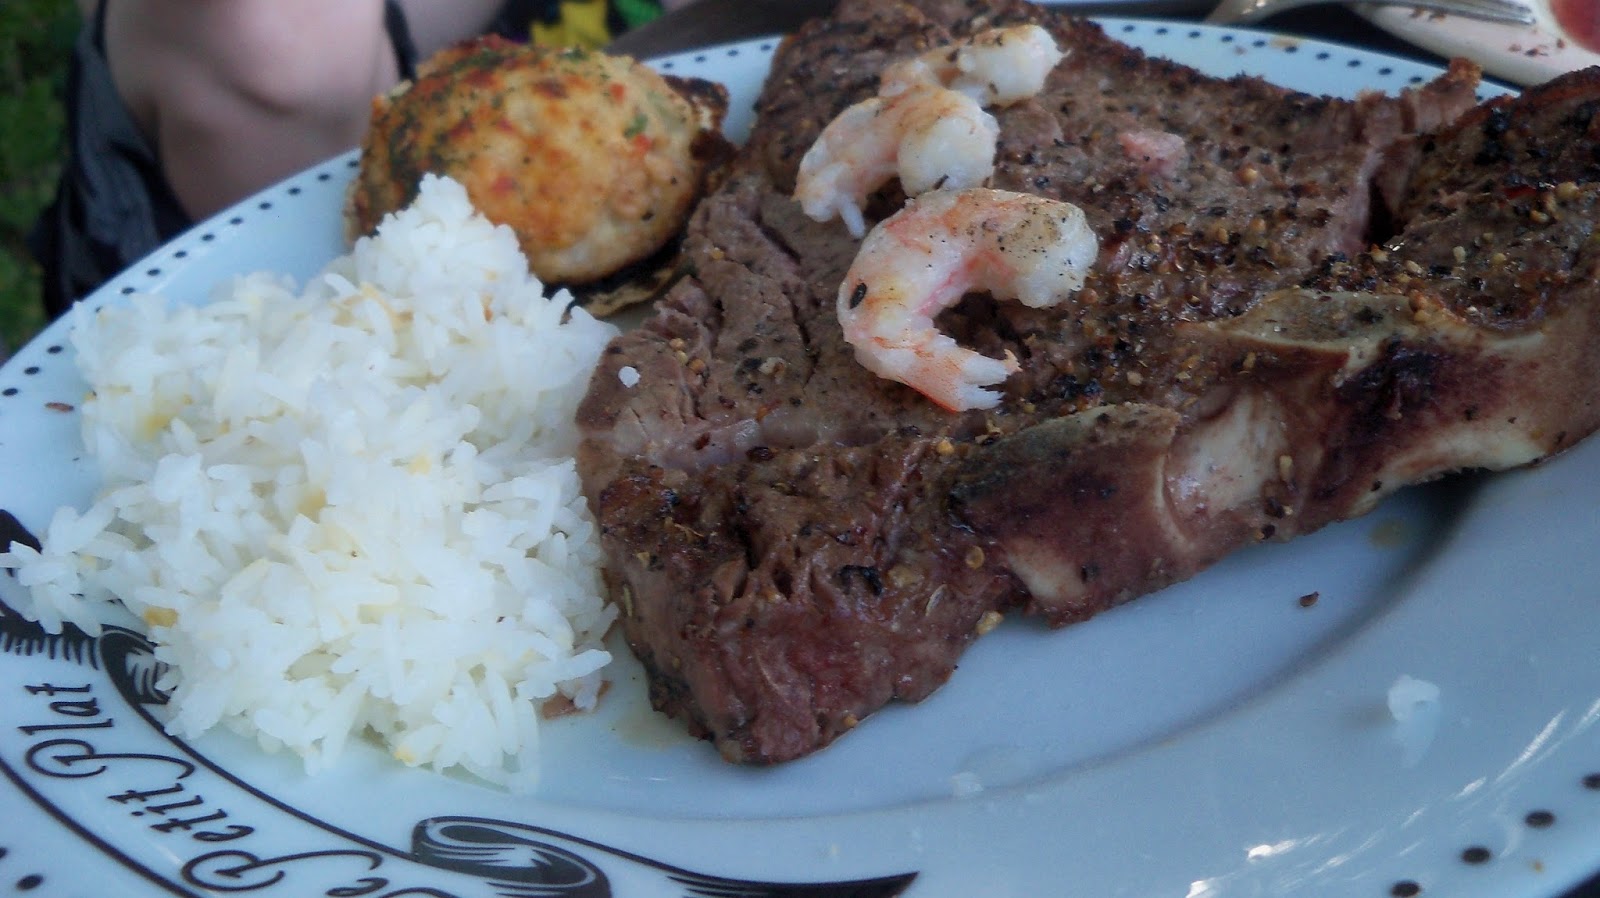
For an extra treat...top a steak with some grilled shrimp!

Following these easy steps, especially with a little practice, will produce excellent BBQed steak every time. For this type of grilling, with no marinade, I suggest the fattier cuts of meat, like Rib Eye or T-Bone. I find a nice marbled cut of meat, with white lines of fat throughout, produces the best BBQ results.


As a side holiday idea that is a real crowd pleasing delight (kids love it), try BBQing pepperoni or salami "logs".

For this take a large size salami, summer sausage, or pepperoni (or other large size cured meat) of your choosing (and there are, of course, some very high end ones,  though for this blog we used a medium priced spicy salami and a dirt cheap No Name pepperoni. The kids will go crazy for the No Name brand grilled...trust me!)

Let sit out at room temperature for about a half hour. Cut the meat in half down the middle.

Place both sides on the grill a bit off to the side so the heat of the charcoal is a bit more indirect. You do not want the meat to burn as it will if you put it right above the center of the charcoal. Grill the meat for about 8 minutes a side or until your desired texture/crunch. Remember, these meats are already cooked, so the length on the grill is about creating a flavour, not cooking!

Slice into smaller pieces and serve.

This is an easy and really delicious treat. It entirely changes the texture of the meat, giving it a "crunch" that it is very satisfying, reduces its fattiness and adds new levels of smokiness. Your guests or family will love it.

Tuesday, March 31, 2015

Standing Prime Rib Roast done two ways: On the BBQ or in the oven with mushroom gravy


There is something truly special about a standing Bone-In Prime Rib Roast, despite the costs associated with them. But, if you can either get them on sale or use them as a terrific substitute for the equally expensive and often far less tasty holiday turkeys or hams, they are well worth the investment.

Though only, we should note from the start, if they are cooked to a proper rare to medium rare. There is simply no point in cooking a Prime Rib Roast if you intend to cook it beyond this point of "doneness". 

Previously I blogged about how to do more "inferior" roasts using the Hi-Low heat method. This method is, in my opinion, also the perfect way to cook the royalty of roasts. Follow these instructions exactly to oven cook a Prime Rib roast with two exceptions. 

First, a Prime Rib Roast does not need the olive oil. Its delightful fat layering and marbling will take care of the moistening that the olive oil is a substitute for.

Also, it is called a "standing" rib roast for a reason. Being bone-in, the roast will come with a curved bone rack on the underside. You want to stand the roast up while cooking, bone side down, fat side up. For smaller roasts, 4 pounds or less, you might find that they fall over at some point during the cooking, but that is OK. Whether the roast falls over or not, you must never, under any circumstances, open the oven. 


When the roast is done, and has been allowed to sit as outlined, I am always partial to cutting the slices a little on the thicker side. The photo at the start shows both the size and doneness that I think makes for a perfect Prime Rib Roast. This will have a great and contrasting texture,  will be incredibly moist, and will be full of flavour.

If you want a gravy, and why wouldn't you, take the tray that you cooked the Prime Rib in and leave all the drippings in it. Add some mushrooms, place it on a medium-low burner and stir to brown them. Add salt and pepper to taste as you go. After a few minutes, add a cup of beef stock and, if you want, a little red wine, and bring to boil. Reduce the heat and let it simmer, adding a tablespoon or two of flour to let it thicken to taste, stirring this in to ensure that it fully dissolves. Simmer and blend down to your desired thickness.

Different people like very different gravies. You will find yours!  

If you want to try for something a little different, and truly spectacular, you can do the Prime Rib Roast over charcoal on the BBQ using the indirect method. This always sounds daunting, but is, in fact, rather easy once you get the hang of it (though you should not let family or friends know that!). 


This method only really works for roasts that are 3-4 lbs or less, so if you are having a few folks over, you will have to do at least two.

First, after following the instructions for starting up the charcoal grill that I laid out in a previous post, instead of dumping all the charcoal in the centre, you must instead divide the hot coals into two separate piles along the side of the BBQ drum, leaving the centre without coals. This can be done with a cheap accessory fitted side tray for charcoal made by Weber and other companies, or by simply piling it!

When BBQing prime rib I suggest using a Montreal Style steak spice as you would on any steak. Coat the roast liberally on all sides with it, other than the bone-in side. As always, leave the roast to sit at room temperature for 30 minutes before cooking.


After you have the separated coals glowing a red or white hot, take the Prime Rib and put it directly over one of the piles for 5 minutes a side. You want to get grill marks and that lovely searing.


Once you have done this, put the roast in the centre of the grill, with no coals underneath. If it will stand, fine, but usually you are better off to simply rest it one side down and flip it half-way through.


You need to cook the roast a further 15 minutes per lb., again making sure to evenly spread the time out in terms of what side is cooking, to get a medium-rare. You should do this "lid on" for the most part, keeping the flue open, and taking the top off every few minutes to allow the coals to get hotter again. You will get the hang of it. 

 If you do not like the timed method, simply check the roast for "give" as you would a steak.

After done, let the roast sit for only 5 minutes, uncovered,  as opposed to the 15 for an oven roast. Again, I suggest slightly thicker slicing.

The BBQ method is incredibly flavorful and worth the effort. The Prime Rib will come out wonderfully juicy and moist, but also with a distinctive smokey charcoal grilled  taste that is impossible to acheive any other way. It is truly delicious.

Enjoy!